I got my inspiration for making this dress from a blog page called Project Run and Play.
Basically they have contests where they give you a theme and you are to come up with a clothing design and make it. I've been watching a lot of western movies lately so when I saw this dress I immediately thought of John Wayne's signature shirt with the bib across the front and how he sometimes lets part of it flap down.
This weeks theme was the June Bug dress remix. Inspired by this dress you make your own dress, or something else. The pattern and tutorial for making the June Bug dress is located HERE.
I did use 2 of the pattern pieces provided in that link, but I also made several of the pattern pieces for this dress too, so I'll be sharing all of them here.
MY PATTERN IS HERE!!!
https://docs.google.com/document/d/1mV3LDzaidZh_9Ig1SQwalLU-w4vY3fQVEArbggLnoUs/edit?hl=en_US
MY PATTERN IS HERE!!!
https://docs.google.com/document/d/1mV3LDzaidZh_9Ig1SQwalLU-w4vY3fQVEArbggLnoUs/edit?hl=en_US
You will need to tape together the sleeve pattern and the instructions should be easy to follow.
The skirt is simply 2 lengths of fabric cut 14" X 23".
This is a size 18 month dress, using a 5/8" seam allowance.
What you'll need:
- A yard of fabric
- 5 buttons
- 3 inches of elastic thread. (For looping around the button on the back of the dress.)
- Thread
2. Next you are going to place your back pieces together, right sides together, and stitch 1 1/4" from the bottom. Your back should look like this.
3. Now sew the bodice front and back sections together at the shoulders, like so. You are seeing my facing sections. You will also be doing this to both the facing and the dress bodice.
4. On all of your seams you want to pink the fabric left over. This is a quick and easy way to make sure that your fabric will not fray and have to deal with strings hanging off every time you wash the garment. Going forward you want to do that.
5. You also want to press the seams open. This makes for a nicer looking seam in addition to being easier to manage when hemming or sewing additional pieces on.
6. Now with right sides together you want to sew the front bodice section to each of the side bodice sections. I wanted to have a little image behind the bib so that as it's folded down the image looks like it's peeking out. I cut a piece of fabric that had a cupcake with a heart on top of it to fit this section. You might would rather applique something on a piece of fabric. If so, do that before this step.
7. Now,place your dress bodice and dress facing pieces together making sure to match up shoulder seams, front seams and side edges. Pin in place then stitch around the neckline and the slit in the back of the bodice.
8. Now you need to fold under the bottom of the facing sections, front and back and press. Here you can see I stitched it into place using a 1/2" hem by folding the fabric over two times 1/4" a piece. That is more work than I should have done. Just fold the fabric under about 1/2" and press.
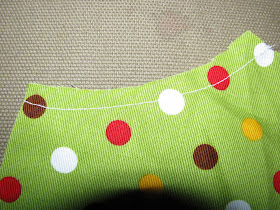
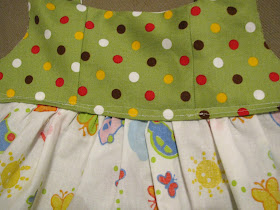
9. Gathering the skirt: Mark the center of your skirt piece and mark the center of the front bodice. The back bodice center is of course where your seam is. Now you want to baste the top of the skirt. That means you are simply going to set your stitch on the longest setting and 1/2" from the edge of the fabric (at the top of the skirt) all the way down the length of the fabric. Then, with right sides together, pin the center of the skirt to the center of the bodice. Pin the sides of the skirt to the sides of the bodice. Now use your basting stitch to gather the extra fabric along until it fits within the parameters of the bodice and pin all of that into place. Next, stitch. If you are a new sewer you want to make sure to remove your pins as you are going or you are likely to break a needle, or bend your straight pins.
The back of the front of your garment should now look like this:
10. Now lay your facing down so that the folded edge lays on top of the gathered edge of the skirt and pin it into place. You want to put your pins on the top side of your garment because you will be stitching from that side. Here is what it will look like when you are done, from the right side and the wrong side.
11. Let's move over to the sleeve section. First thing you need to do is hem the bottom of the sleeve. I folded my fabric over 1/4" twice and stitched.
12. Mark the center of the top of your sleeve. Now to gather the sleeves you are going to put a baste stitch going around the top of the sleeve, from one dot to the other. Pin the center of the top of the sleeve to the shoulder seam, right sides together. Pin the sides of the top of the sleeve to the sides of the shoulder until you get to the dots. Then draw the basting stitch up to make the sleeve fit the shoulder and pin it into place before stitching it all around. When you are done it should look like this:
13. Now with right sides together, fold the sleeve in half and stitch down the length of the sleeve and the garment. Like this:
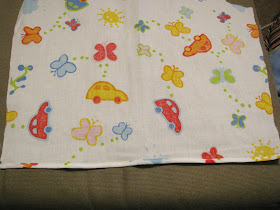
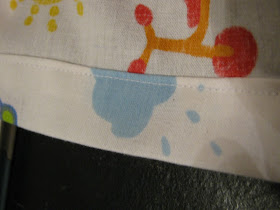
14. Now hem the bottom of the dress 1 1/4". First fold the fabric under 1/4" then 1 inch and stitch.
15. Now for the bib section: Put the bib pieces, right sides together and stitch all the way around leaving a gap large enough to turn the bib right side out at the bottom of the bib. Once you get it turned right side out fold the gap in and stitch.
16. In the above photo you can see that I have placed the bib on the front of the dress matching the centers of the bib to the center of the front of the dress. Pin the bottom of the bib in place and stitch through all the gathers in that section. You are stitching over the stitching you just did when you sewed the gap shut.
17. Now to sew the buttons on. I didn't do button holes because I don't want my bib to be removable. So I placed my buttons where I wanted them and stitched them through all the fabric on the front of the dress.
Fold the flap down and put a little stitch in it the same color as the fabric so that it looks like it's just laying down.
18. One more thing, you need to sew a button on the back top of the slit on one side. On the other side, you are going to make a loop with your piece of elastic. Tye a knot in it and stitch it on the inside of the back of the slit, so that the loop sticks out and can loop over the button. This is how the dress will be closed in the back. You could also add a hook and eye instead.


this is gorgeous! love it!! i cannot get the pattern link to work. it brings me back to this page
ReplyDeleteThanks for telling me. It was weird 'cause every time I told blogger to test the link it took me there, but when I tried it as a reader it wouldn't. It is fixed now. I also put the web address there so it can be copied and pasted. If there are any more problems please let me know. Thanks again.
ReplyDelete