Pages

Thursday, May 21, 2015

Patriotic Baby


Poor Lenore, I feel like I've hardly sewn her anything.
My mom has recently brought a lot of clothes to the girls when she visits.
This is a blessing.
And it has helped me be able to sew something for Lenore instead of focusing on making summer clothes for Kai.  Lenore needs things because she doesn't have hand-me-downs to pull from.
We thought we were done having kids, and she has been a little surprise blessing.

By the way, have you any idea how hard it is to take pictures of a 6 month old modeling an outfit?
Most of the pictures turned out blurry.  The best pictures were taken AFTER my precious model spit-up on her new outfit.

I just finished it, and want to be sure to get it in by the deadline for Project Run and Play.
They said we have until May 22nd.  Since I'm not sure if they mean by midnight tonight or on the 22nd, Eastern Time Zone or some other,  I'm putting this post together quickly with the pictures I just took before putting her to bed for the night.
I guess I'm about to find out.


The project for this month was this cute little top by The Crafty Cupboard.


Isn't it sweet?
It wasn't sized for a 6 month old, but I was able to make it smaller with no problem.
I used cotton knit to make this outfit.
The first thing I did was make a wider skirt portion so it would be much fuller.
 I just love flutter sleeves, and decided to do two on each side, since I knew I'd be adding two ruffles around the whole thing.


My favorite feature just may be all the stars I sewed into the skirt of the dress.
It's called reverse applique.

I drew some stars onto the white knit, cut them out and then sewed it to the wrong side of my dress fabric.  Then I trimmed around my star shape on the back.  Finally, I cut out the dress fabric, inside the star shape on the front of the dress.  Voila!  Reverse applique!

My second favorite thing is the peek-a-boo back on the back of the dress with the ruffled bloomers showing through.

My third favorite thing is that it took 3 unwanted t-shirts to make this outfit.
My sister recently asked me if I wanted to go through a box of clothes she was taking to the local thrift store to donate.  I scored several new looking t-shirts her husband didn't want.  Love to upcycle!

I had a lot of fun making this outfit.  Whew!  It's getting more challenging to sew at this stage of her life.  She got her first two teeth this week AND started crawling in the past two days.  So I'm busy to say the least.  But it sure is fun to sweat over.  And now my sweet baby has a festive outfit to wear to this weekend's Memorial Day celebration.

One of the reasons I love participating in Project Run and Play is that it continually motivates me to push my creative envelope.  I can tell I've gotten better at the little details since stumbling across PRP.  I'm very thankful to get to be a part of sewing with all the ladies that participate with me.

I wish I had gotten my diaper bag finished in time.  You can read about it here if you want to see what I came up with.
Monday, May 4, 2015

Baby Wash Cloths


6 months later than I wanted to have them, but I just found the fabric in the storage unit tonight.


Snuggle flannel bought from Joann Fabric store some Black Friday many moons ago.  I cut it into some decent looking squarish/rectangular shapes.  I didn't bother to measure them.


Delsin got out of bed while I was putting a zig zag stitch around the edges.  So did Lenore.  He asked if he could do the rest of them.  He wanted to be a part of making something for her.  He's so sweet. 


Sunday, May 3, 2015

A New (to me) Way To Refurbish Old Dress Shoes


Can you believe these are the same shoes?
We bought them at Gap in August 2014.
Carolina needed some shoes to wear in the beauty pageant, and these were the perfect shade of pink.
She loved them.  As you can see she nearly loved them to death.
When the recent beauty pageant rolled around and Carolina needed new shoes I was faced with the daunting question, "Do I take these 5 children out shoe shopping for a new pair of dress shoes for Carolina?  Or do I figure out how to make her current dress shoes work?"  
It didn't take a split second to know that I had no interest in taking my boys shoe shopping for a girl unless absolutely necessary.  There would be too much whining, running, and overall mayhem if I take them to a series of stores.  I thought I remembered seeing someone refurbish some old shoes during a season of Project Run and Play some time ago.  I quickly started the task of scrolling through each and every post on their blog page, in an effort to find what I was looking for.
I did not find it.  But I did find this awesome shoe project.
I like the author a lot.   She has a blog over at www.cathgrace.com  .
I have pinned more than one thing she did on Project Run and Play.
I followed this tutorial with some slight changes.
I took pictures along the way so I can share the experience with anyone that would like to try it.

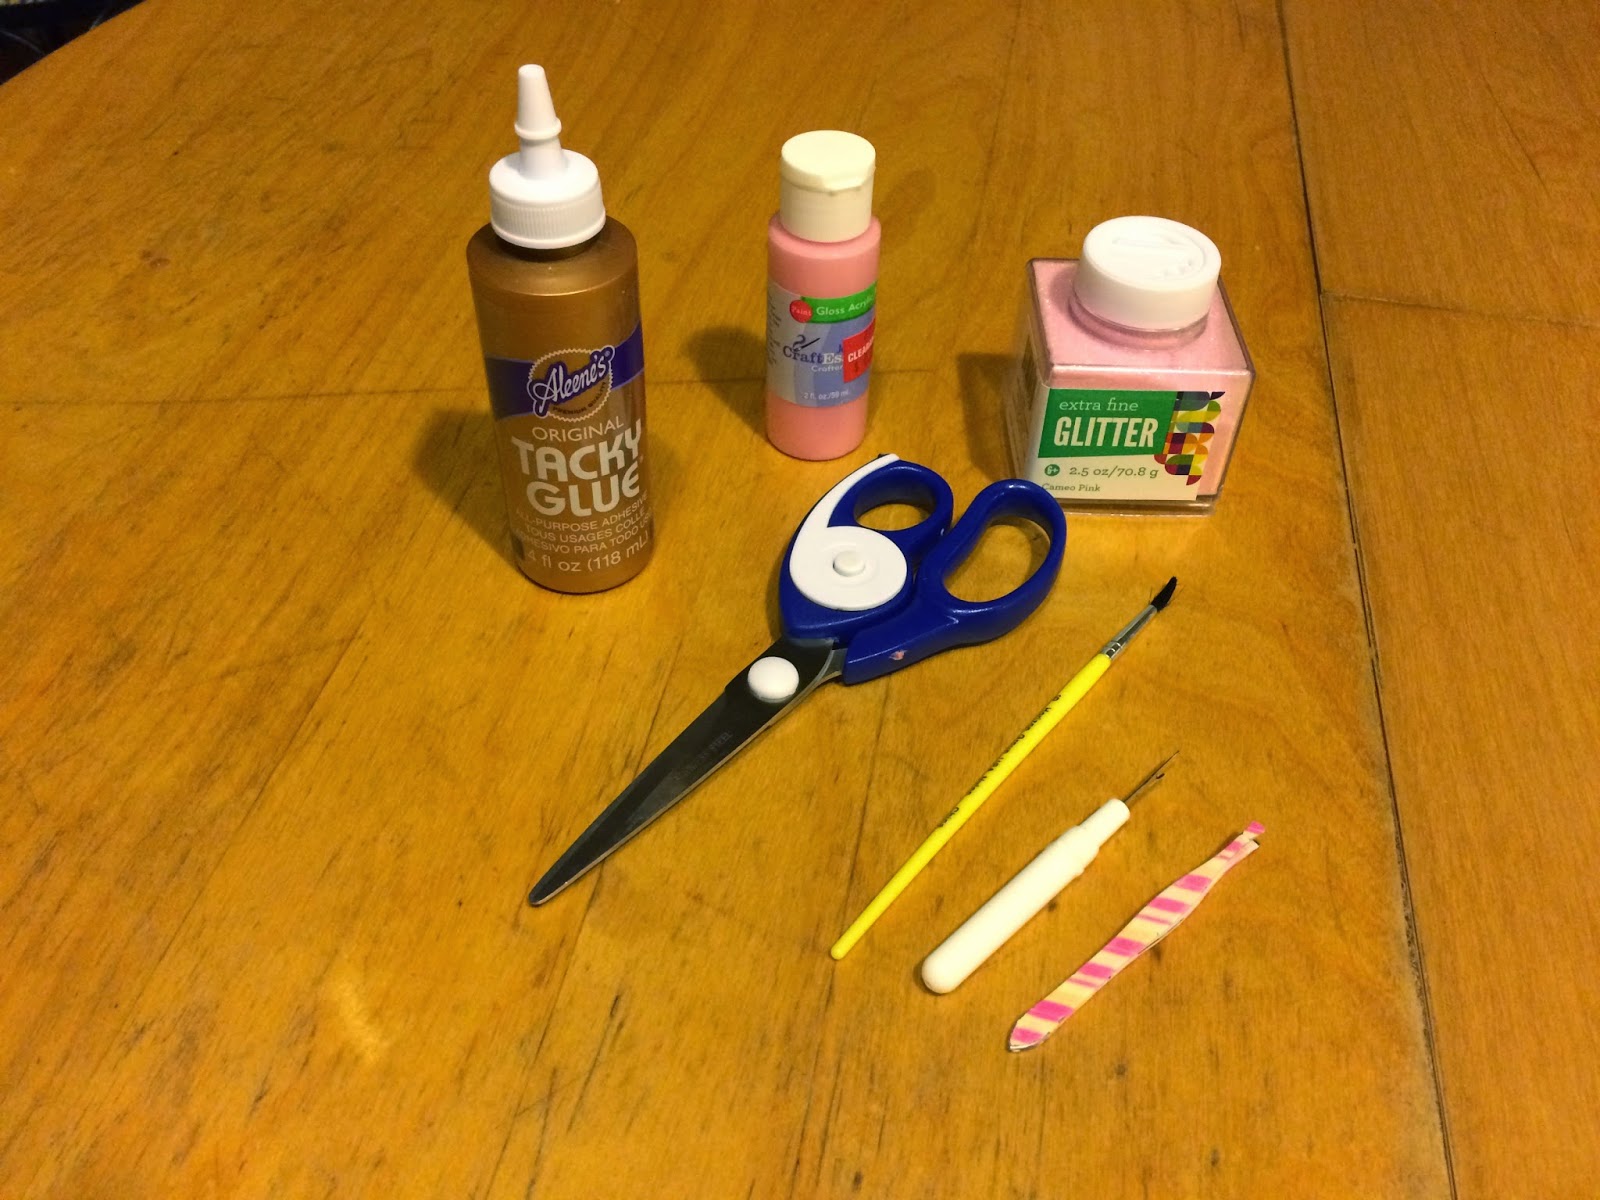
 Some things you'll need are tacky glue, craft paint, fine glitter, scissors, paint brush, seam ripper, and tweezers.  Not pictured: fleece or felt, needle and 8lb test fishing line, or jewelry making nylon thread, two sizes of beads, embroidery hoop and scrap of cotton fabric to use as stabilizer.


These shoes were so cute when we bought them.  
That's why she wore them every chance she got.

First, remove the pink turned brown ribbon and flower.

The first thing I did was take my closest matching craft paint and paint the shoes.  
I wanted to just cover the scuffs, but the shade was darker, so I had to go ahead and cover the whole shoe.  I was worried this could cause problems with chipping and coming off, but that hasn't been the case.

I took the tacky glue and mixed it with water. 50/50
This made it thinner and more manageable.
Then I painted the dried, painted shoes with it and covered them in the glitter.

 I did 3 coats of glitter.

For the heart shaped beadwork I followed the tutorial by Catherine from www.cathgrace.com very closely with slight differences.  She used felt under the beads and I used fleece.   Because that's just what I had on hand.

Always upcycling where I can I was able to use the small clear beads from this necklace.
My friend Erica gave this to me 5 or 6 years ago when she cleaned out her jewelry box.  She gave me several things that the kids would play dress up with.  But this one had been abandoned in my room for quite some time now.  It was time to give it a new purpose.  The other beads used are ones I purchased from my craft supply store.  Light pink glass beads.

OK, so what you see here is I'm sewing the beads to the heart shaped fleece.
Using the nylon thread, or fishing line, bring your needle up through the fabric, up through a larger bead, up through the smaller bead, over the side of the smaller bead, back down through the larger bead and finally back down into the fabric.  
Repeat until you can't get another bead sewn onto the heart. (Or whatever shape you are using)

Now cut them out and glue them onto the front of your glittered shoe.
Use the tacky glue (not mixed with water) to do this.  I used large paper clips and clothes pins to press them while the glue dried.

That's it!  

Now try keeping her out of them.


Easy Bath Apron Tutorial

I just got done converting all of our hooded baby towels into bath aprons.

Bath apron

I saw bath aprons on Pinterest in recent years.  I pinned one that was made from a regular bath towel, but we already have several hooded baby towels.  I knew I would be using those.  


It was really simple actually.  Using scraps of ribbon stuffed into my ribbon basket I just took ones that were about a foot in length and sewed one on each side of each hood.


You just tie the ribbons around your neck, then you already have a towel in place when it's time to get your baby out of the bath.  No reaching/dropping/sweating bullets while keeping hold of the baby and grabbing a towel at the same time. 


Thanks for checking it out.  What did you work on this weekend?